Freenove ESP32-S3 CAM
Start by confirming the basic periodic capture behavior with a camera-equipped ESP32-S3 board.
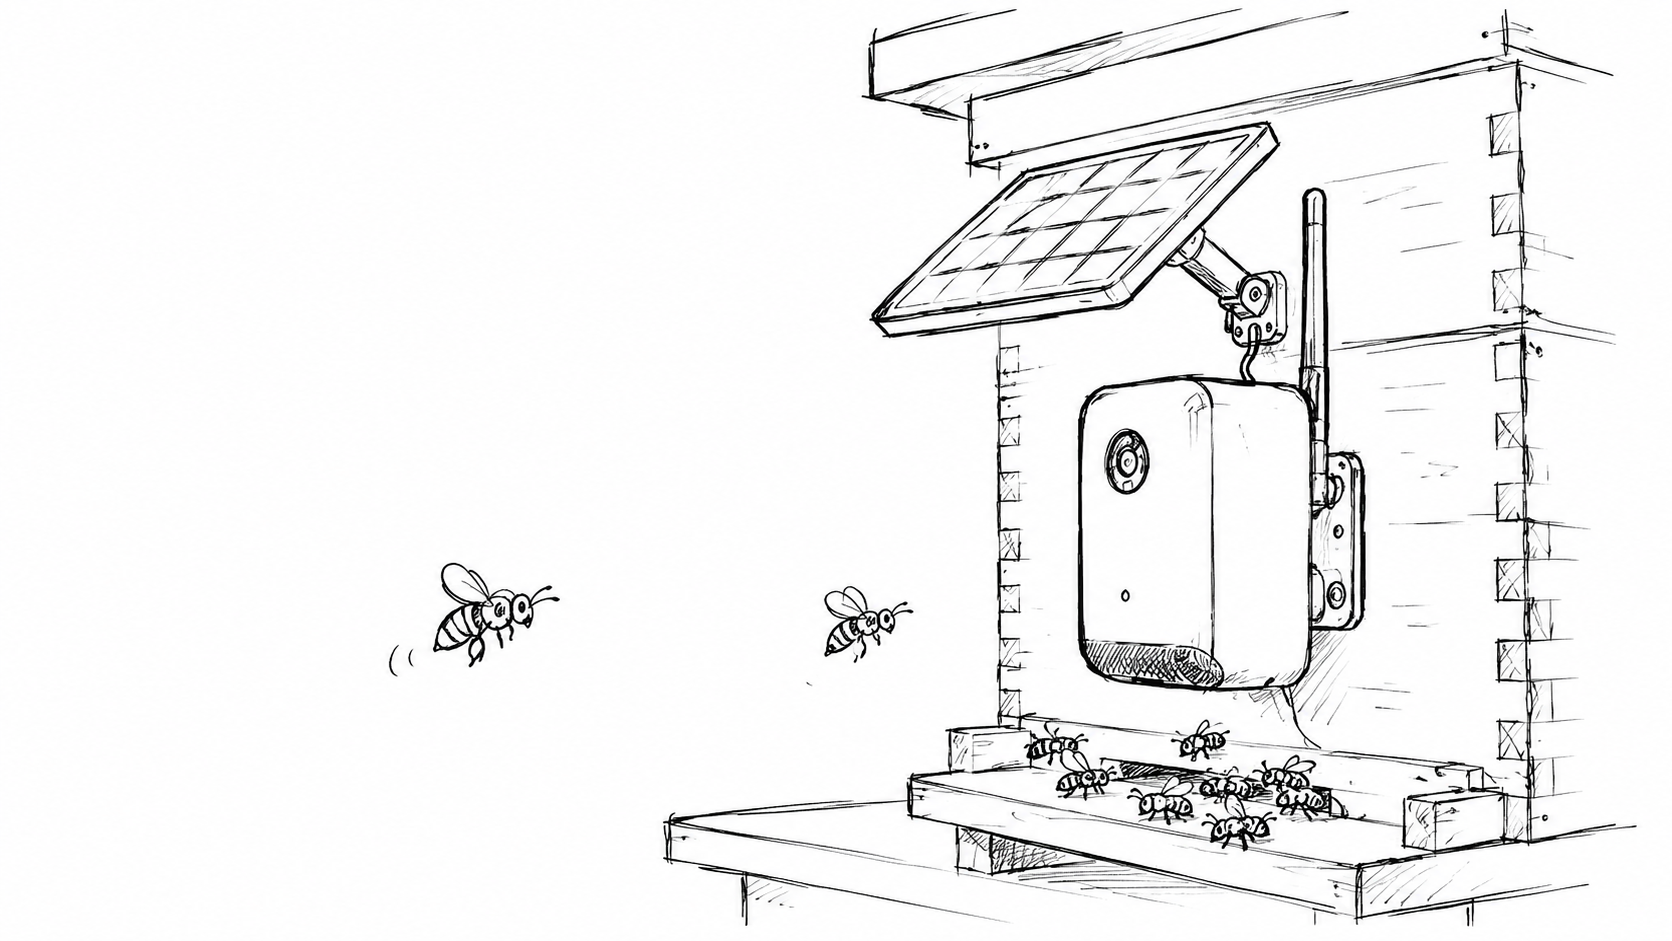
Beehive Monitoring Module
A monitoring module for periodically photographing a beehive area and reviewing bee visits or surrounding changes later. Development starts with a Freenove ESP32-S3 CAM saving photos to an SD card.
The goal is to check whether bees are visiting the hive and whether the surrounding environment has changed without needing to visit the site each time.In the first stage, reliable photo capture and SD card storage are more important than communication features.
Overview
The module periodically photographs the beehive entrance and surrounding area, then stores the images as a time-based observation log. The intent is to review not only whether the hive was occupied, but also the location, box shape, and installation conditions.
Start by confirming the basic periodic capture behavior with a camera-equipped ESP32-S3 board.
Prioritize saving captured images locally before adding communication features.
After the basic behavior works, move on to solar power, battery operation, and a 3D printed enclosure.
System
The first prototype runs from USB power and saves photos from the ESP32-S3 CAM to an SD card at set intervals. After that, sleep behavior and power consumption will be checked before moving to solar charging and battery-powered outdoor use.
The camera-equipped ESP32-S3 board is the center of the first capture and SD storage program.
Captured images are saved to an SD card so visits and surrounding changes can be reviewed later.
Once the basic behavior is stable, charging, supply, and power budget will be balanced.
After the power layout and part placement are fixed, an outdoor enclosure will be designed.
Operation
The first version does not try to include every feature at once. Capture, storage, power, and enclosure design are checked in order so the device can eventually work outdoors.
Run the board from USB power and capture photos at a fixed interval.
Save captured images to the SD card as a record that can be reviewed later.
Review capture interval and standby consumption for longer outdoor operation.
Combine the solar panel, battery, and power control parts, then 3D print an enclosure around the final layout.
Observation
A failed hive placement is hard to interpret from the final result alone. Image records can show whether scout bees came at all, how often they visited, and what installation conditions should be reviewed.
This may point to the location or surrounding environment not being discovered.
This suggests reviewing the box shape, entrance, scent, height, direction, or placement.
Images can help reveal when visits happen and how they relate to conditions.
Multiple locations or boxes can be compared for future placement decisions.